
Summary
Add brand images to your custom emails to users: upload images, and resize them using HTML.
This feature is available to all customers.
This 2-step method requires:
- uploading an image to your Library makes the image available across the portal and gives it a shareable URL
- in the email templates, embed the image in an email template, using Source to access the HTML
Add image as a resource in the library
- From main navigation select Library, then from center navigation select Resources.
- From the action menu, select Add resource.
- Enter a name in Title and save.
- In Resource file, select Upload file and choose your image file.
- Once your image is uploaded select Shareable URL and copy the URL.

Note: The Show on resources tab option makes whatever you upload available to all users. Leave in default OFF state, to limit your image to admin users only.
Add the image link to the template
- Navigate to Settings > Email > Custom Email Templates.
- Select the email template you want to edit.
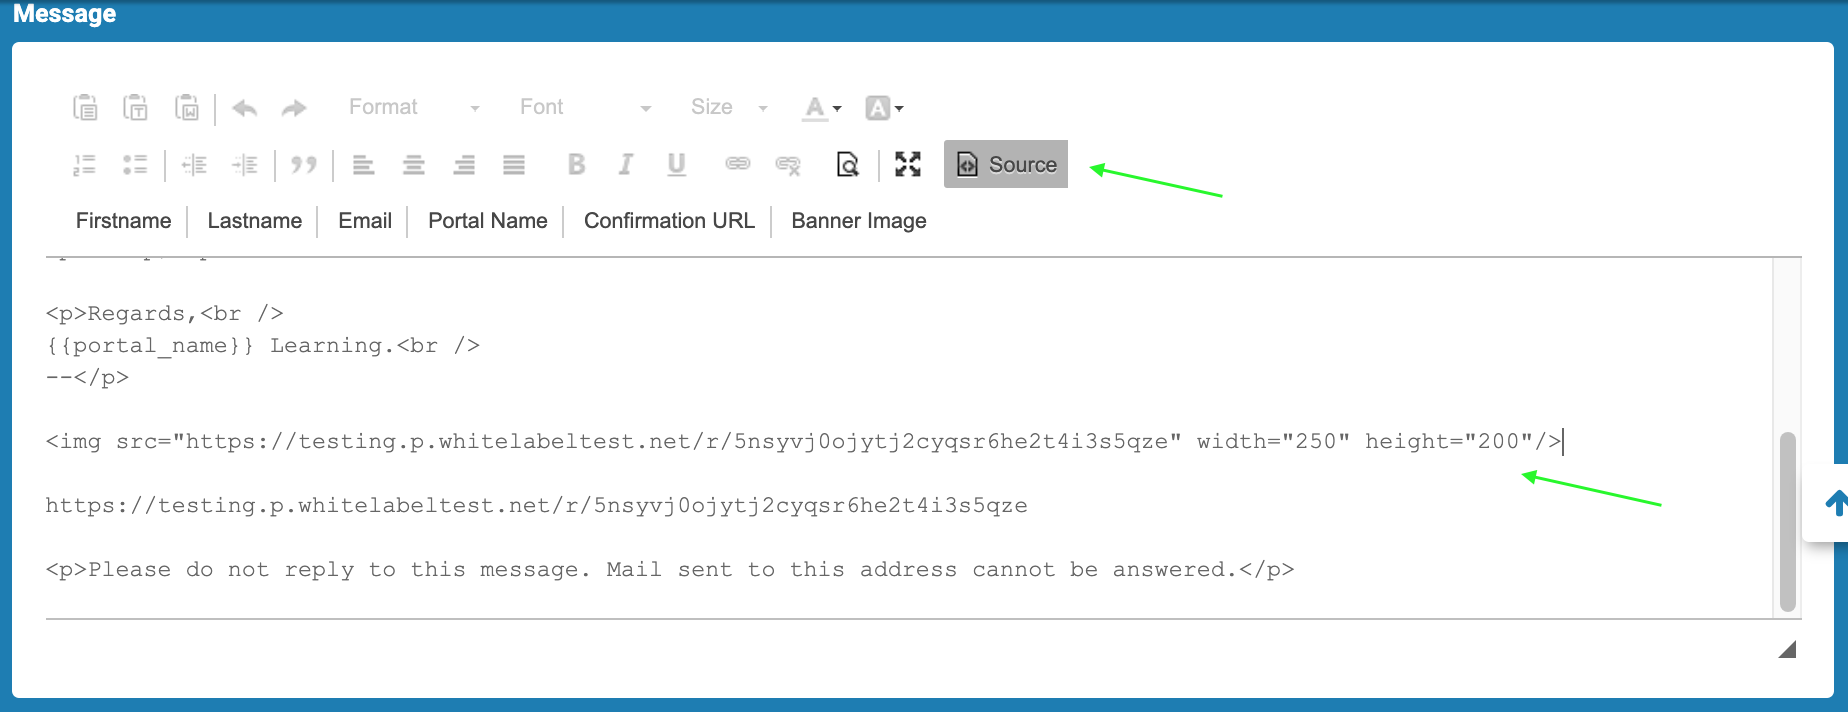
- Select the Source button in the editing options for the template, to view the HTML version of the template.
- Enter the following HTML code where you want the image to appear, including the image URL, and the width and height of your image. Save to finish editing.
<img src="Image URL" width="Width in pixels" height="Height in pixels"/>
- From the Actions menu, select Send to self to send yourself a test message, to view the result.
See:
- Create a resource
- Create and edit banner images for email notifications
- Manage custom email templates
- Images: crop images and provide alt-text